Modding Setup 1
Author: Elfe
Summary:
This tutorial scopes with the setup and a basic overview of the most relevant modding tools. It therefore shows how to setup the Asset Manager properly and a further part explains how to create your first mod.
Parts Index
- Modding Beginner’s Guide I
- Modding Beginner’s Guide II 1.2k
- Modding Beginner’s Guide III (yet to come)
Index
1.0 Preparation
1.1 Tools Overview
1.1.1 Asset Manager
1.1.2 World Editor
1.1.3 Quest Editor
1.1.4 Conversation Editor
1.1.5 PSEditor1.2 Prepartion
1.2.1 Foreword - Timesaver
1.2.2 Foreword II - Mod Types
1.2.3 Setting Up Asset Manager2.0 The First Mod
2.1 Normal Mods
2.2 Map Mods
1.0 Preparation
Ready to start modding?

(Meme by Ceno & me)
You sure? 
So I’ve heard there are still crazy people out there wanting to get into modding but have no idea on how to start. If you belong to these persons, this is the right place for you. Besides, this guide might also be useful for some experienced modders, especially in terms of keeping your mods clear/clean.
To beginn modding Grim Dawn, you first need to prepare a few things to make all the tools work and you also can get some timesavers to make modding faster / more comfortable but more on that later. First I’ll give you a brief overview over the most commonly used modding tools that will be delivered alongside the game automatically.
Please note that this is a chronologically guide and that I’ll asume you know all previous steps before going on with something as I’m not going to explain the same thing over and over again. I therefore recommend reading the entire guide even thought it might be long, you’ll learn a lot that you otherwise would have missed.
Also this guide may contain several parts where you will stumble across what I consider “best practise” whereas best practise means working patterns I’ve been using that have proved to be success-leading in terms of archiving goals and keeping your mod clean. All of these are my opinion and not neccessarily objective.
1.1 Tools Overview
1.1.1 Asset Manager
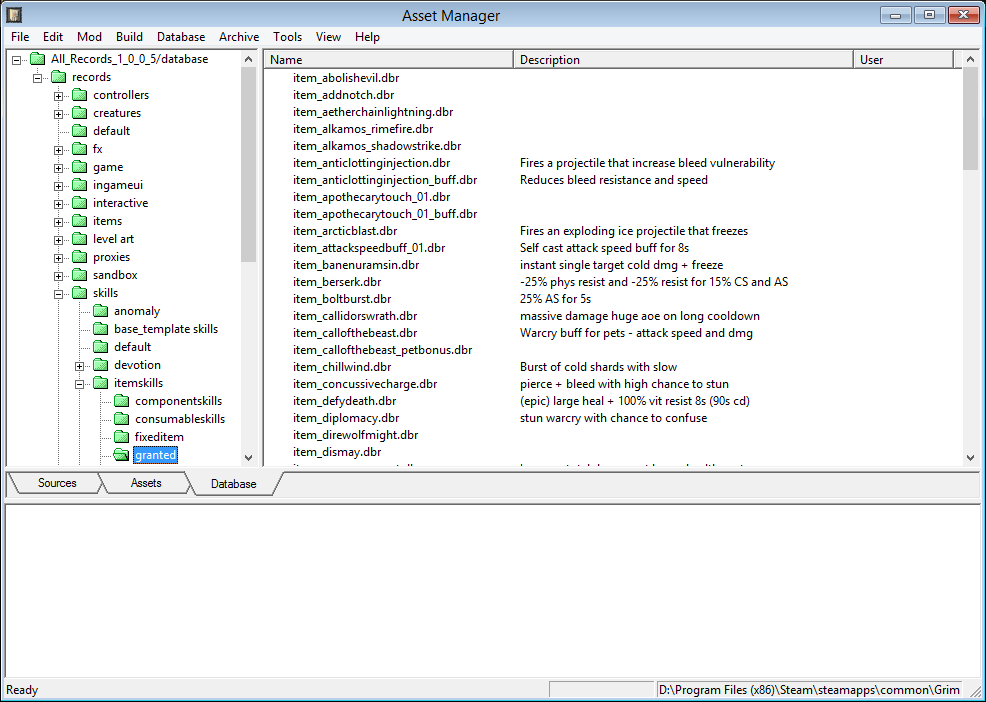
The Asset Manager is probably the most important modding tool as this is where everything comes together: Adding new resources 195, asset creating / converting, database entry editing and building everything together as the final mod. This is also where we will start to set up your directories to make the tools work.
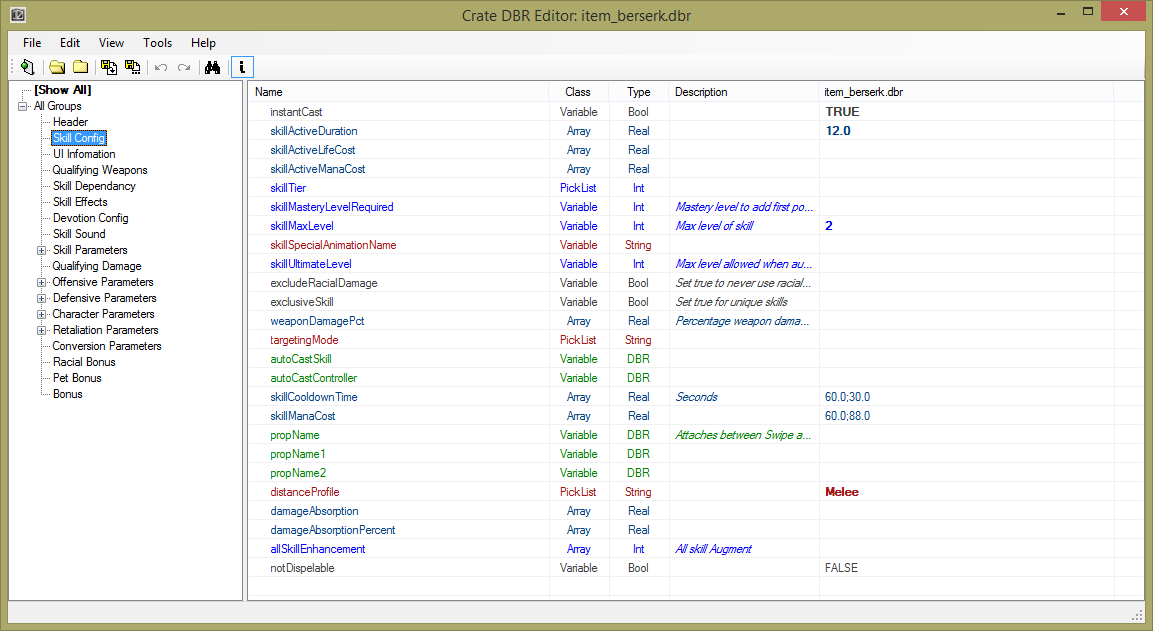
Another tool that will be used through this one is the such called DBREditor, which is a text editor basing on templates that will display .dbr (database record) files in a more organized way than simple text editing:
1.1.2 World Editor
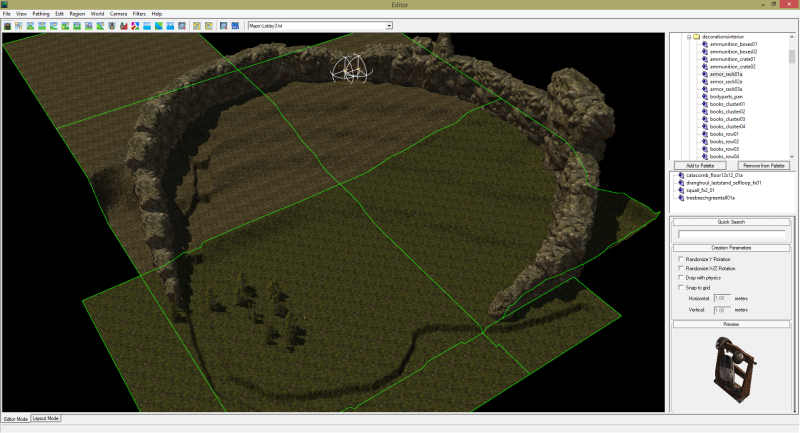
The World Editor is where levels get designed. There are a bunch of tools inside it and a guide to most of them available here 66 as well as a beginner’s guide to map making by Mirenheart here. 50
1.1.3 Quest Editor
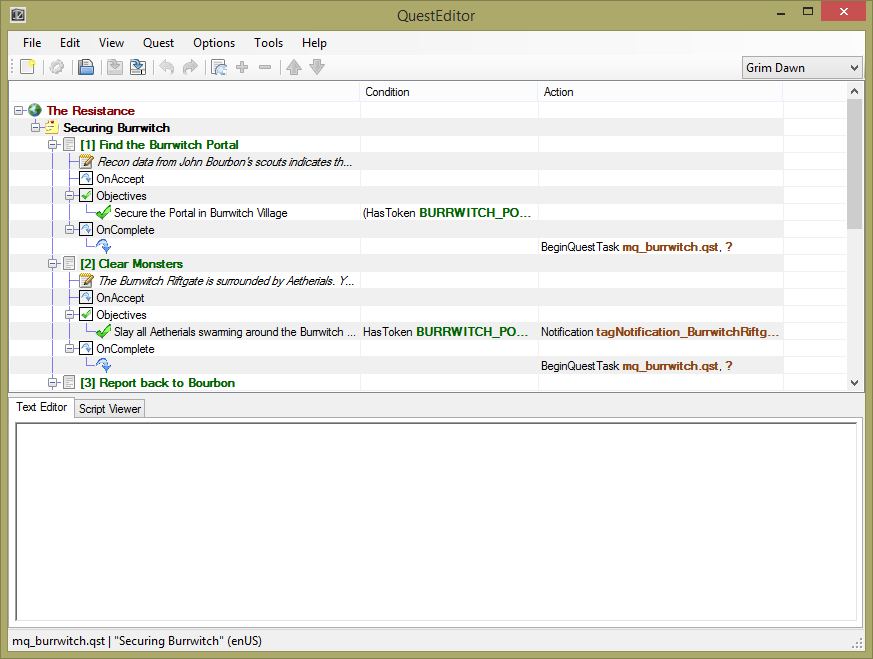
The quest editor is responsible for linking together conversation and scripts to build quests basing on an action-reaction principe.
1.1.4 Conversation Editor
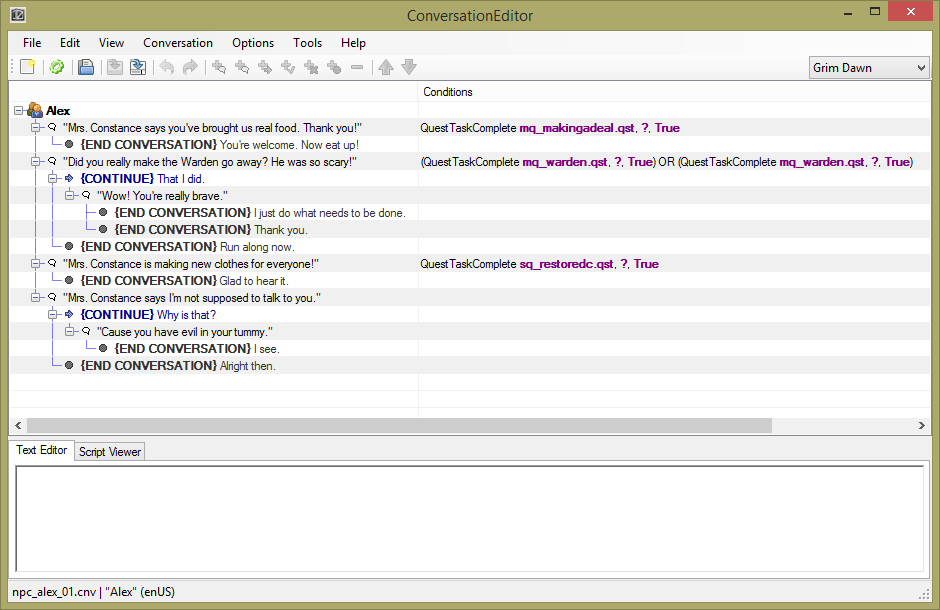
The conversation editor is where you build conversation trees. You may notice it’s format is pretty similar to the quest editor which is a result of both working together closely.
1.1.5 PSEditor
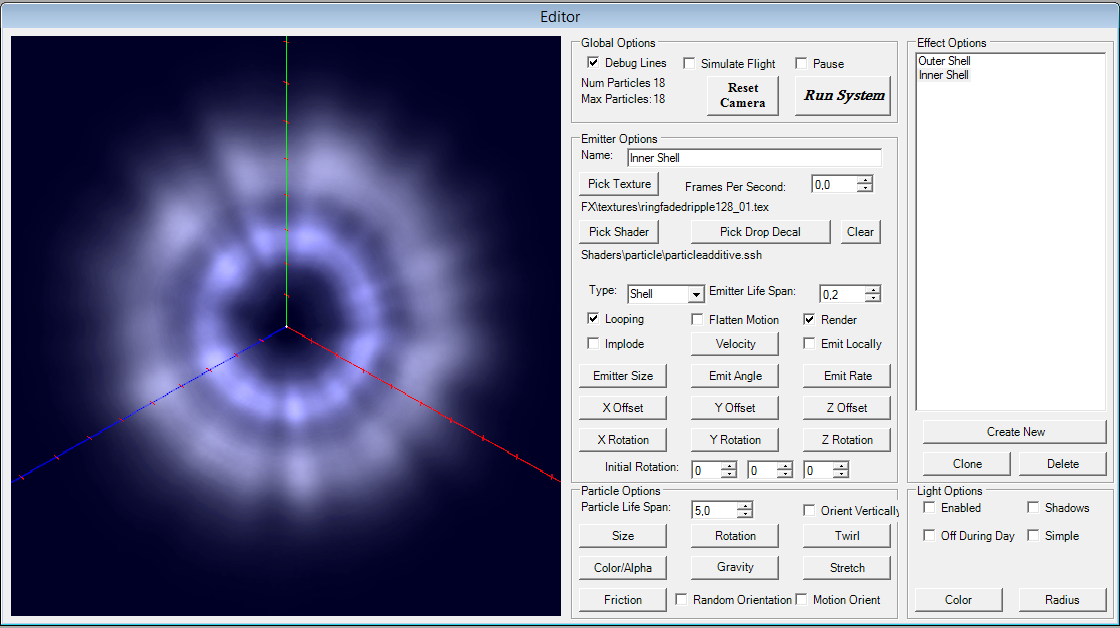
The Particle System Editor is where all particle effects are getting created. It works with Emitters and particles and also supports different shaders.
1.2 Preparation
Now that you got a brief idea of what the modding tools look like, we’ll get down to prepare them to begin modding.
1.2.1 Foreword - Timesaver
Now this is a collection of tools that will make your life easier by saving you a lot of handwork and time consuming, repetitive actions.
This is a tool that will save you from opening your Grim Dawn install directory every time you want to start a modding tool by providing shortcuts to all tools, relevant modding directories, a game start shortcut as well as an browser like texture viewer. It also will always clip to the topmost window if it is one of the modding tools so that it will never get lost and be easily accessible.
Requires the .NET Framework 4
This is a tool that uses a query like syntaxt to enable you to search the game files for specific things. Will be especially helpful when you search for ingame stuff as these things are usually not called the exactly same in the game files as they are ingame.
Requires the java runtime 1
Mastery Editor by WareBare 108
This is a tool that visually supports you when it comes down to creating masteries. The current version at the time this guide is written will help you pick the right coordinates for your skills. There is a full visual version work in progress that will go beyond that by allowing to rearrange the entire mastery / class selection screens and everything that belongs to it.
1.2.2 Foreword II - Mod Types
You might think now “oh my god, I just want to start modding, why are you shooting me with all this information?”. The simple reason is that I want you to be able to choose the right type of mod for what you want to do so you don’t have to go through painful remakings later when you realized your mod is a few mbs or maybe even a gb larger than it should as it happened to a few persons already.
Alright now there are 4 different major mod types as long as we stay within the scope of what the official toolset offers:
Normal Mods
Normal mods are the result of what happens when you only modify database entries or resource files without building your own custom map. They are started through the custom game menu and will bring you into the usual world of Cairn where your changes will be applied.
Map Mods
Map mods are pretty much what the name says: They introduce custom made maps instead of the original Cairn world. In between with the introduction of GlockenGerda’s Map Decompiler 48 it’s also possible to merge both or extend Cairn with your custom made maps.
[Deprecated]Hard Mods
Hard mods are mods that do not need to be started explicitelly; They are created by modifying the main game’s database and / or resource files so that the changes will always apply without having to start a mod. Now this has different up and down sides and is also sort of deprecated:
Pros:
- Pretty much the only mod type that let’s you change the main game’s menu background
- Does not need to be explicitelly started through the custom game menu
- Allows playing mods with main game characters
Cons:
- You will not be able to play with players online anymore unless the persons you want to play with use the same modified game version
- Usually very big filesize up to nearly a gb or more except for one certain exception
- Deprecated as this is not really needed anymore unless you want to make a total conversion of Grim Dawn: This type of mod used to be required a while back as there were certain database files that the game won’t read changes from unless they get written into the main game’s files directly. This has been patched since and therefore is no reason anymore to use hard mods.
In general, usual mods are recommended over hard mods whereever possible as hard mods are a real pain for both modder and user as building such mods takes extremely long and you’ll get to build your mod very often as for users it’s a pain to download that big files over and over again whenever you release a new update of your mod.
However there is, as with most things in modding, an exception: If you simply want to modify resource files without a database then there are two more types of “hard mods” that you can take advantage of. I’ll explain only one of them as the second one will required a lot of files, too and therefore is rather even worse than the type of hard mod explained above but more on that topic in the practical part later.
[Deprecated/Support Dropped]Bouce Mods
Bouce mods are a special type of normal mods; They are started through the custom game menu, too but they won’t bring you into Cairn directly but get you back to the game menu and at the same time apply your changes so that you can play with your main game characters while having your mod changes applied and at the same time join multiplayer games no matter if the coresponding players have the same mod activated or not.
With the introduction of the Crucible (survival) mode, this got patched out as it gave Crate trouble and therefore is no more available.
1.2.3 Setting Up Asset Manager
Finally it’s time for some practical steps: Setting up your Asset Manager! Why Asset Manager first? Simply because it is an easy way to get the main directories to work that you will need for modding: Your working, tools and build directory. Alright, let’s start:
First, you’ll have to open your windows file explorer and navigate to your Grim Dawn Installation folder which lies by default in
You should see a folder that contains a bunch of directories and files that looks like this:
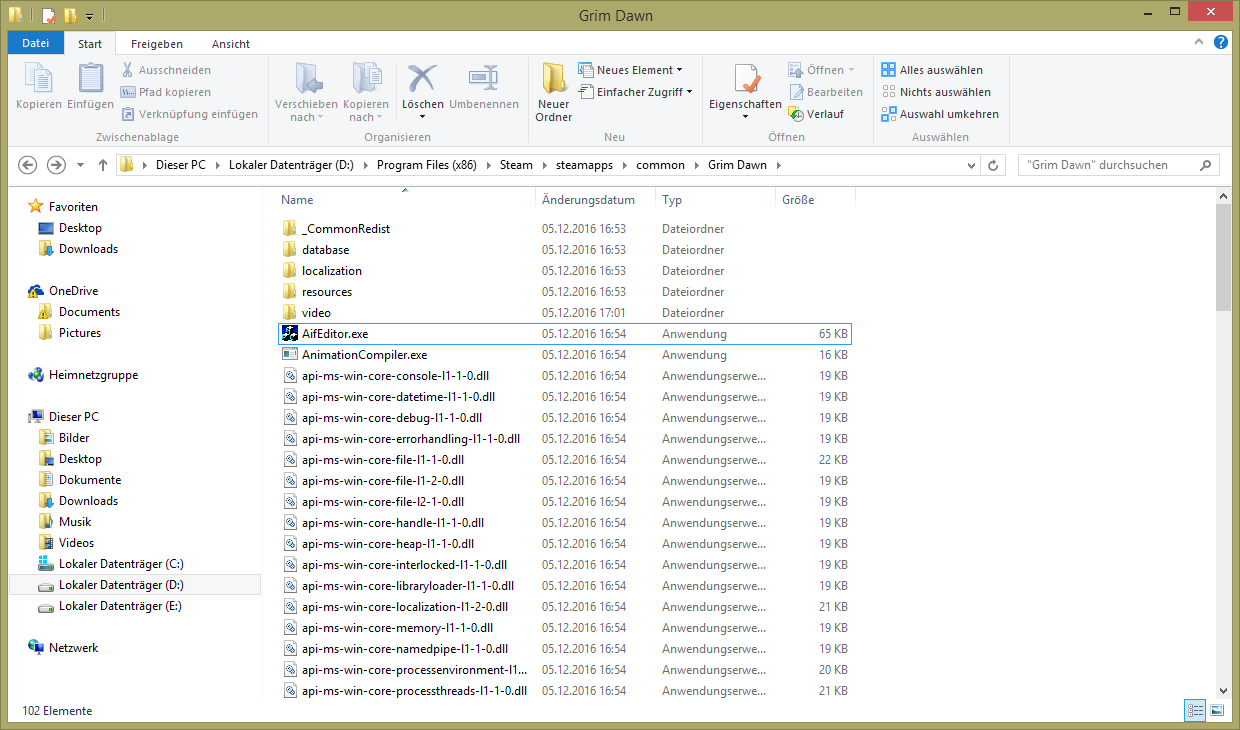 (For me it’s in D, just ignore that, it’s by system design)
Now if you search this folder, you’ll find a file called AssetManager.exe. Start it (note: may require administrative rights as it otherwise couldn’t do required file operations).
You should get rewarded with the following login screen now:
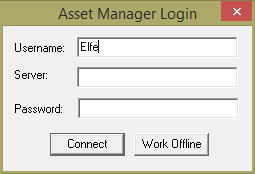
For now, all we want to do is a simple setup and one person projects so we’re going to work offline. Click “Work Offline”. This window will get interesting when you decide to work together with other modders but dealing with that would be kind of an overkill right now.
Now there should a bigger window open that looks like this:
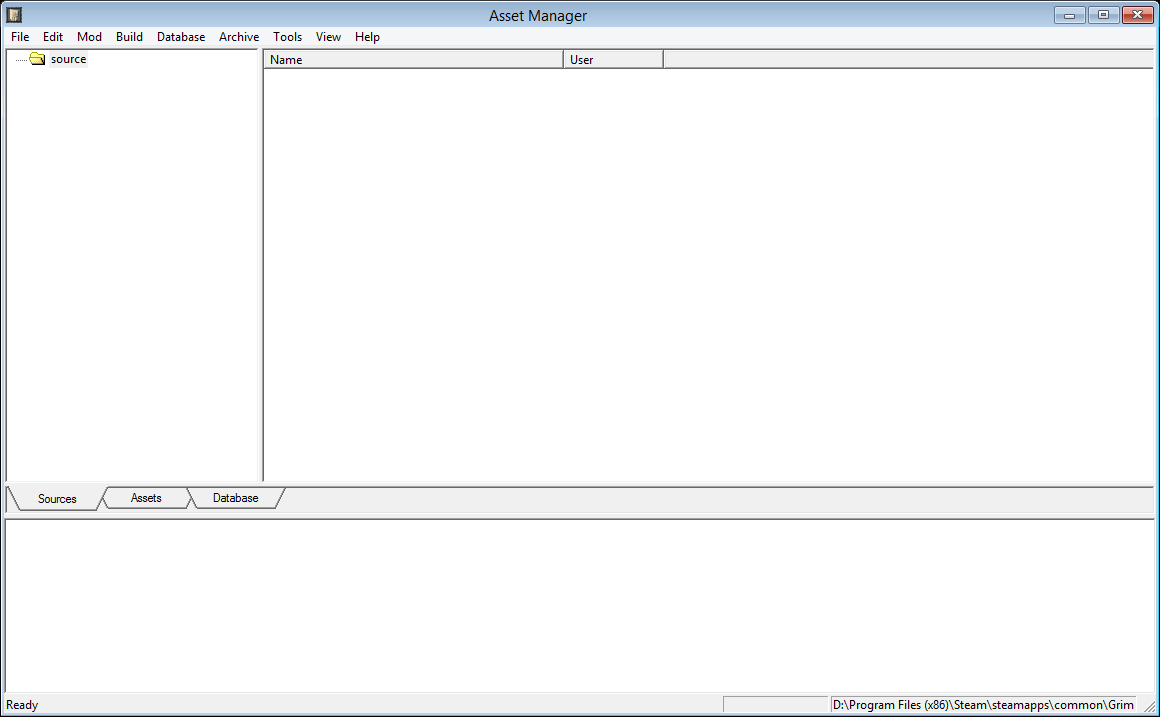
As we want to set up or directories, we now need to click Tools → Options in the menu:
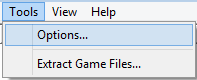
This window should open:
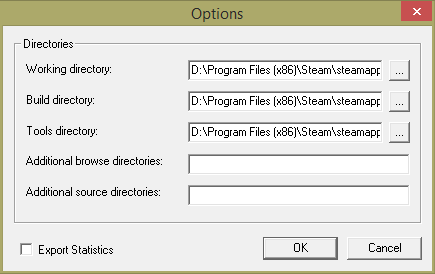
Now there are 5 fields in which we can put directories. For now only the top 3 will be interesting to us as the other two ones are for more advanced modding and when it comes to merging mods / working with expansions. The Working directory is where all the source files for your mods will go, the build directory is where your “compiled” output will get to once you build your mod and the tools directory is where your modding tools are, which is by default the game’s main installation directory.
Note for Gog Users: Your paths will be different though the base is the same, the only difference is where your installation directory lies.
These three path might be set for you already, but we’re going to change one of them. The build directory should point to your game installation directory as the Asset Manager will use this path to create a new folder “mods” inside the installation folder from which the game later will read mods to enable you to play your mod:
Whereas the Tool directory should be the instalation directory:
Now by default the working directory will point to the same directory as the build directory which is also recommended by the official modding guide.
This is bad practise as it will result in a mix of output files and source files and might confuse you and potential other modders later if they want to merge your mod with other mods so we’re going to seperate them and make “clean mods”. Also there are several more clean mod guidelines and best practises but more on that later.
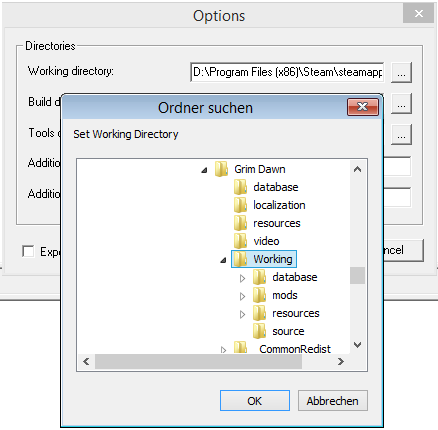
We’re going to create a new folder inside Grim Dawn’s installation folder called “Working”:
and put it as working directory. You can navigate to it by clicking the […] button in the Options window in the Asset Manager:
Note: Keep this in mind as the […] button is the idea of a file browser button in the Asset Manager. You’ll find these buttons very often while modding. They usually indicate that you can choose a database record file or a resource file as reference for that certain entry.
Ashes of Malmouth Integration
If you have the Ashes of Malmouth expansion you will have to do a few additional steps in order to be able to work with the expansion files. As mentioned before, there are two more fields “Additional Browse Directories” and “Additional Source Directories”. The additional browse directories field enables the Asset Manager to read additional database record files from a seperate .arz file while the additional source directory provides the Asset Manager with additional resource files for the resources browser window.
To make these functional with the xpack, we’ll set those to the following paths:
Additional Browse Directories:
The additional browse directory needs to be set to the location where the game stores the xpack data as .arz file inside a folder called “database”. By default it should be in the game’s install directory in a subfolder called “gdx1”, so the path by default looks like this:
Additional Source Directories:
The additional source directories path must point to a subfolder of your working directory as this is where the gdx1 resources will be extracted to in the next step. By default it’s in a subfolder inside the working folder in “mods\gdx1”, which would be the following path (assuming you use the above recommended working folder structure):
If you consider to rather use the default variant, your path should look like this:
These changes will make the game read both from the main game and the expansion files and merge them into one file structure for both the DBR and the resource import dialogs, so you won’t see any extra “gdx1” folders but instead find the corresponding files in their equivalent folder strucure alongside the normal game files.
Forgotten Gods & Future Expansions
If you have the Forgotten Gods (or any possibly following Expansion), you’ll have to take another additional step in order to be able to use the files from the corresponding expansion.
Just as with the AoM expansion before, you need to set additional Browse Directories and Additional Source Directories for each expansion you want to add to your Asset Manager. All you need to do is add the paths to the expansion files as before with the AoM paths by concatenating the paths with a semicolon (;). The paths need to be in reverse order to their xpack number. This means that if there were 3 xpacks, the order would be PathToXpack3;PathToXpack2;PathToXpack1.
For example if you wanted to add Forgotten Gods files, the default additional browse path to these is the following (assuming you use the working directory variant described earlier):
If you now want to add the path to your Additional Browse Directories, assuming you already added a path for the AoM files, your path should look like this afterwards:
C:\Program Files (x86)\Steam\steamapps\common\Grim Dawn\gdx2\;C:\Program Files (x86)\Steam\steamapps\common\Grim Dawn\gdx1\;
Also the same goes for the Additional Source Directories, assuming the path to your Forgotten Gods files are at the following location:
The result would again be a semicolon concatenated path:
C:\Program Files (x86)\Steam\steamapps\common\Grim Dawn\Working\mods\gdx2\;C:\Program Files (x86)\Steam\steamapps\common\Grim Dawn\Working\mods\gdx1\;
Another side note regarding expansions:
The Asset Manager will extract all files from all expansions by default, not matter if the Additional Browse / Source Directories are set or not but it will only display the files correctly in the Import Records window (and also in the World Editor) if the paths are setup correctly.
Now that we set up our directories, there is only one thing left to do: Extract the game files so we can start modding!
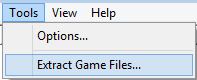
To do this, choose Tools -> Extract Game Files in the menu:
And then locate your Grim Dawn installation folder and select it:
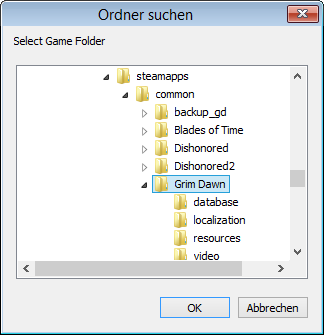
Now press “ok”. You’ll get a warning that you’re about to write the files into your working directory but that’s perfectly fine for our purposes, so you’re going to press “yes”. Now the Asset Manager will be kinda busy for a while as it extracts the entire database and all resource files so you can work easily with it.
Once you did this you’re done setting up your Asset Manager and therefore the most important directories setup! Congrats 
You may wonder now why I only go through the setup of the Asset Manager with you. This is simply because it will suffice for most of the modding tools except for special ones like the PSEditor and I don’t want to confuse you even more than I already do. This will be enough to start out with basic modding and there are more advanced tutorials for these special cases already so there is no need to do it again.