Modding Setup 2
Author: Elfe
Summary:
This tutorial scopes with the setup and a basic overview of the most relevant modding tools. It therefore shows how to setup the Asset Manager properly and in this part explains how to create your first mod.
Parts Index
- Modding Beginner’s Guide I 377
- Modding Beginner’s Guide II
- Modding Beginner’s Guide III (yet to come)
Index
1.0 Preparation
1.1 Tools Overview
1.1.1 Asset Manager
1.1.2 World Editor
1.1.3 Quest Editor
1.1.4 Conversation Editor
1.1.5 PSEditor1.2 Prepartion
1.2.1 Foreword - Timesaver
1.2.2 Foreword II - Mod Types
1.2.3 Setting Up Asset Manager2.0 The First Mod
2.1 Normal Mods
2.2 Map Mods
2.0 The First Mod
Since your directories are now prepared and your gamefiles extracted, we finally can begin with some actual modding. In order to do this I’ll guide you through two short introductions for the still remaining important 2 mod types. I’m not going to explain hard mods here as they’re obsolete in most cases anyway and there have already been others doing that in case anyone is ever going to need it (which i doubt).
2.1 Normal Mods
The first type of mod we’re going to deal with is normal mods as this is the by far easiest way to get a quick start into modding. Fire up your Asset Manager and enter offline mode to begin modding.
Once the Asset Manager is open, go to Mod -> New in the menu:

Note: The same menu will get you back into your mod later once you closed and reopened the Asset Manager. Simply hover the “select” option and choose your mod name from the list to make the Asset Manager load your mod again.
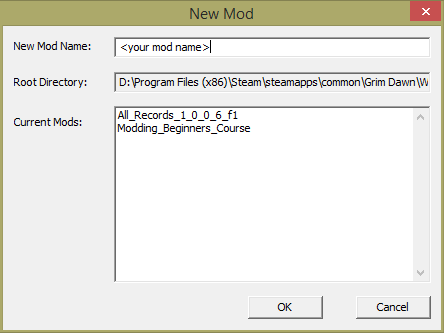
You now can choose a name for your mod. If you’re not sure how you want to call your mod you can rename it by hand later though I’d recommend to choose a mod name and stay with it as the internal records management might get confusing later and in case of mod name related paths you’ll have a hard time renaming and updating all paths without breaking anything.
I’ll call mine “modding_starter_guide” for now. Note that you can not use special symbols nor whitespaces for your mod name. Use underlines instead.
Also you’ll notice a list of existing mods below which will help you determine which mod name you can use and which not since you can not have two mods that share the same name unless you use multiple working directories but that’s going to be really complicated.
Press “ok” once you found a good name. This will make the Asset Manager set up all neccessary directories for your mod.
In theory you now have a mod that would work if you build it, just that it would pretty much do nothing.
To build your mod, you can either use F7 or go to Build -> Build in the menu:
 Congrats, you now have your first, empty mod. If you now go into your game and choose custom quest in the game’s main menu, your mod name should show up in the mods list. If you select it and start a game you should get into Cairn as usual, just through your mod.
2.2 Map Mods
What we’re now going to do is going a step further and convert our mod into a map mod. To do this, I assume you to have done the steps above to create a new mod before (See 2.1 Normal Mods).
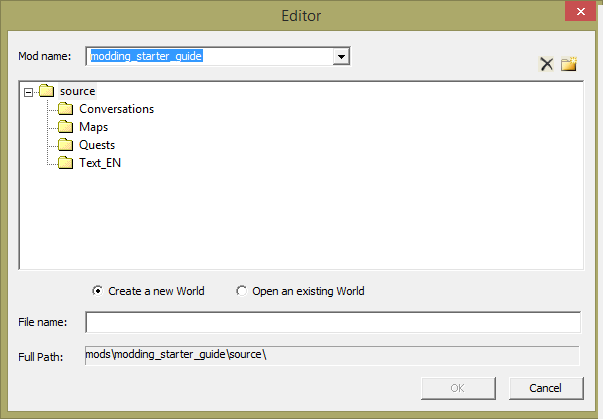
What we will need now is the world editor. You can find it in your tools directory which is by default your Grim Dawn install directory. It’s the file called Editor.exe. Double click it to open.
In the “Mod name” drop down menu, select your mod:

You now should get multiple underfolders for your “source” folder in the treeview below:
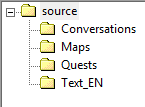
The official guide suggests you to create a new folder for this which is called “levels” but we will stick with what most modders do and simply use the maps folder. Select the “Maps” folder and enter a name for your world below:
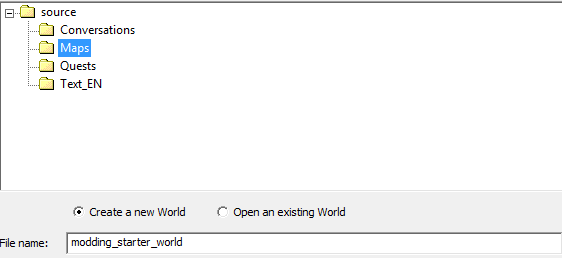
I’ll name mine “modding_starter_world” for now. Press “ok” when you’re done.
You should get rewarded with a fullscreen black application. This is the such called Layout Mode of the world editor, a basic levels overview and where you will be adding new regions and move them to the place where you want them to be.
What we now want to do is adding a new region. To do this, click “Region” → “Add New Terrain…”:

A window called “New Terrain” should open:
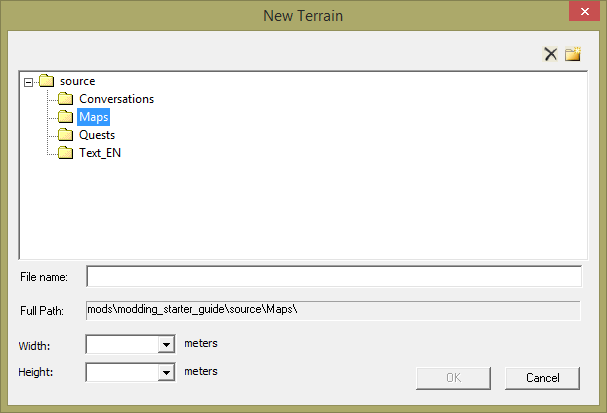
Again, select “Maps” and enter a name for your current level. The entire world consists of different levels that are connected together.
Now you also will need to pick a size from the drop down list. You also can click ok already now but this will result in a new level that has a size which is bugged so we don’t want to do this. I’ll choose 128x128 for now:

And click “ok”.
You should see some quader inside the dark now:
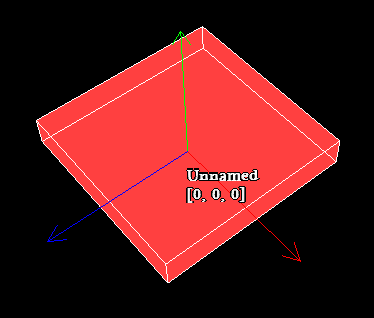
If you don’t see the green, blue and red line, click the quader to select it.
Best Practise: Move the quader a few steps away by using either the blue or red line. This will prevent the editor from spawning levels on top of each other when adding new levels as this can be a pain to sort out if you click away and loose the level selection and need to move everything away to get down to the particular level you just created.
Then click the double arrow button below the menu to change to Editor Mode:

You should end up in another window that will show you an empty map.
On the right there should be a side bar where you have a treeview with a folder called “records”. Expand it until you get to the following object:
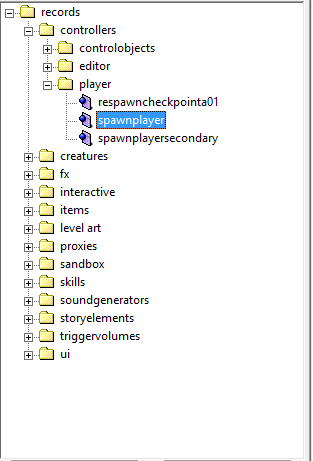
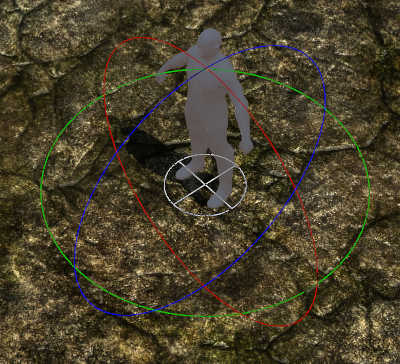
Click it and then click somewhere onto your map to place the spawnplayer there. An object similar to this one should appear:
This is the point where players will enter your world for the first time. If you want to add respawn points you can do so by placing a “respawncheckpointa01” object which is above the spawnplayer object in the treeview. Once you walked near them, you will respawn there instead when reentering the map or dying.
Now that we have a spawnplayer and a level we can go on and build the map all together. To do this, change back to Layout Mode by clicking the tab in the lower left corner:

You should see the black layout window again now. What we want to do now is building the maps pathing first to make the level editor calculate all the areas where we can walk / not walk. If you don’t do this you can either end up in a world where you can not move at all or everywhere. To do this click Build -> Rebuild all Pathing in the menu:

A window with a progress bar should open. Wait until it’s at 100% and press ok. You can ignore the warning that says “1 region(s) failed to save” and also the warning “One or more regions could not be saved” as those simply imply that we have to save everything by hand later. These two warnings will always pop up when doing this.
Next we want to make the editor build our map. To do this click Build -> Rebuild all Maps in the menu:
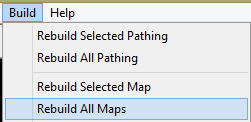
Another window similar to the rebuild pathing window will open. Wait until it’s at 100% and press ok. When you get to more complex world later with multiple levels you also can do both of these steps for a selection of levels instead of for all. To do this, you can simply select all levels you want to build in the layout window and then use the “Selected” menu buttons instead of “All”.
Your map should be visible as textured quader now instead of a half transparent one-colored block. Now we can save the world by clicking File -> Save All in the menu:

The well known wait window will appear again and as already before, once it’s complete you can click ok and close the World Editor as our map is now build and saved in a way that enables us to use it as an asset which brings us back to the Asset Manager
Back in the Asset Manager, click Mod → Select…-> your mod name to select your mod in the menu.
You should be in the Sources tab on the left side of the Asset Manager. There should be another treeview with a folder called modname/source. Expand it and click the “Maps” folder:
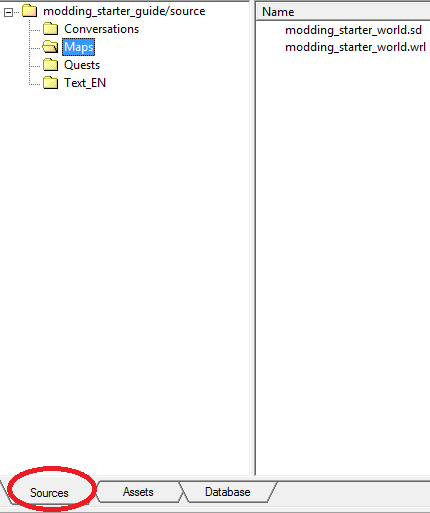
You should be able to see a file called yourworldname.wrl as shown in the screenshot below. Right click it and choose “Auto Create Asset”:
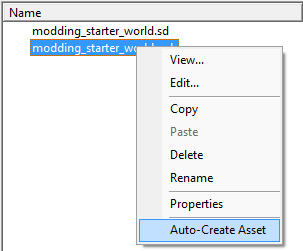
A window will open. Let everything as it is and click “ok”. The Asset Manager now creates an Asset file that can be found in the Assets tab next to the Sources tab. You now can either locate to yourmodname/assets -> maps -> yourworldname.map, right click it and choose “build” or simply build your entire mod by pressing F7 or Build -> Build in the menu.
Important note regarding building Assets: You need to build your mod at least once via F7 / Build -> Build menu before being able to use the right click variant as you’ll otherwise get an error telling you that the Asset Manager failed to update an archive. This is because the Asset Manager first needs to create a Maps.arc file which can be updated before being able to update it. It will create it once you have a map asset and build your entire mod but not before that.
Congrats, you now can enter your world in the custom game menu inside Grim Dawn!
Keep in mind that you will always have to repeat all the steps from building pathing to building your mod once you updated your world as otherwise the file the game reads will not get updated. The only part you do not have to do again is the right click on the .wrl file to create an asset as it’s already there and will be updated automatically once you either build the asset or the mod.
